Then it dawned on me that the Sudan is not that different really from the Anglo-Zulu War, admittedly I'd done this in 15mm. And was it really that much different from the Indian Mutiny either, lots more sand true enough. So after making my first building for the Sudan reality set in and I scratched the project.
Luckily, Andrew a friend from New Zealand who had already bought my massive Ancient Spanish army was into the Sudan, so it was shipped to the other side of the world to live with him!
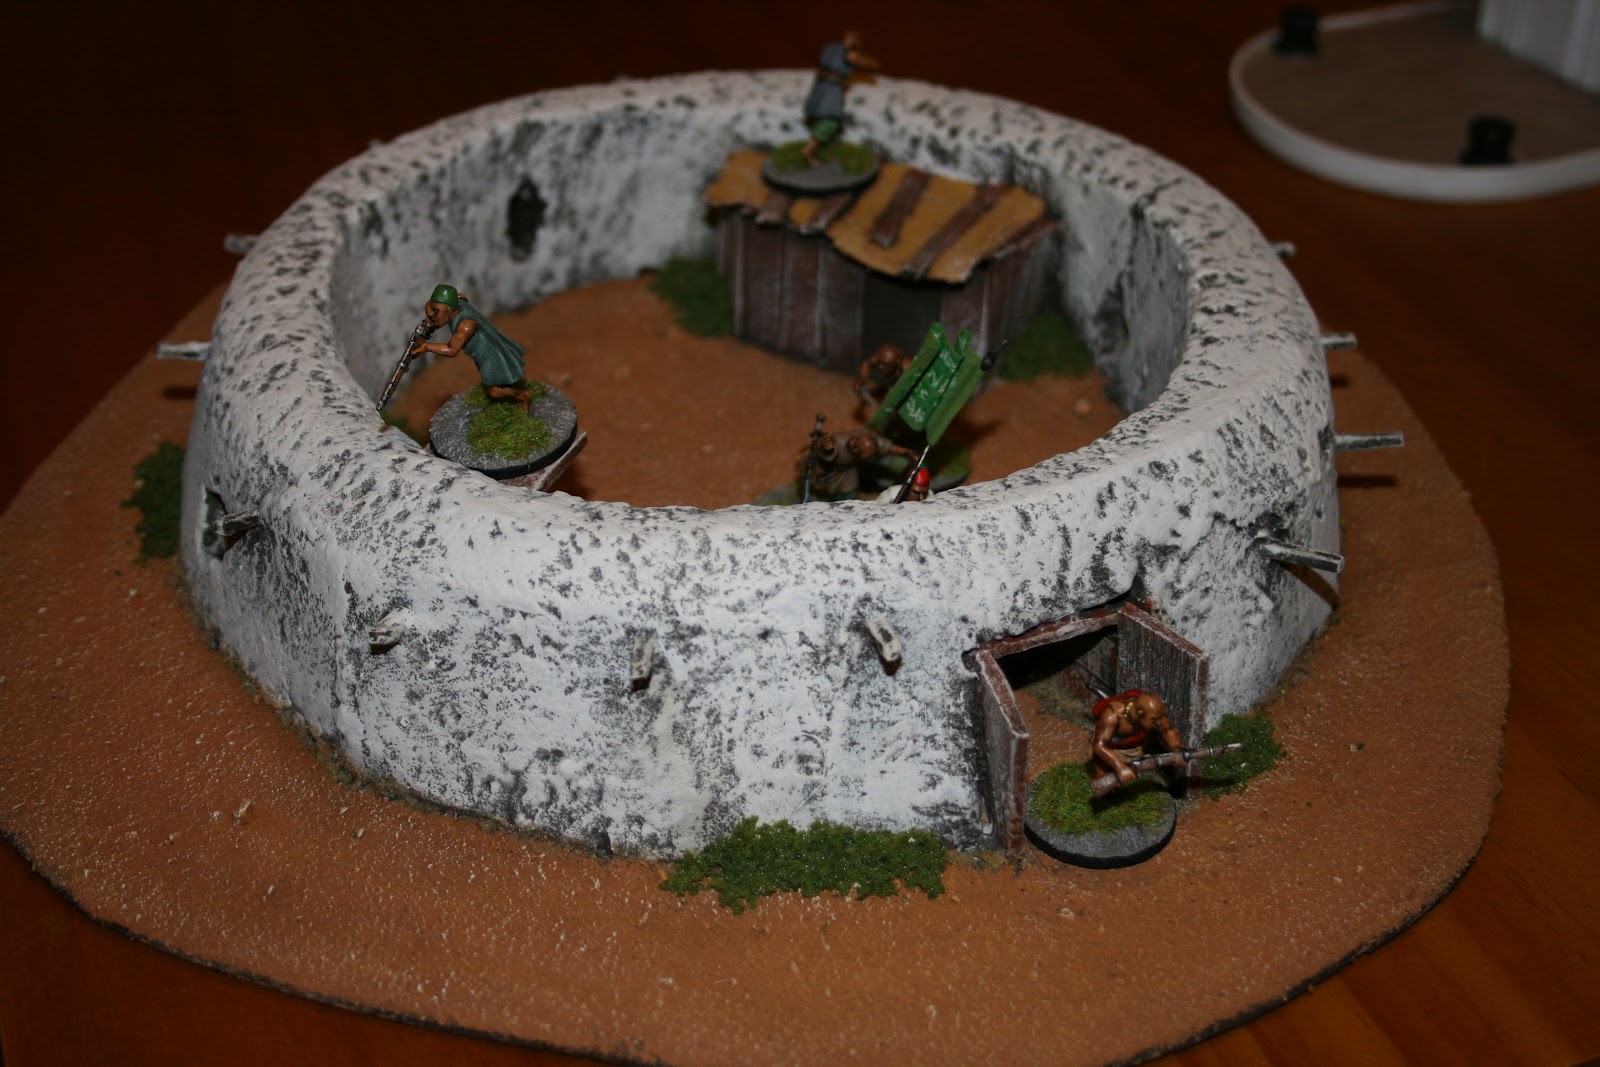
OK, so what you'll need for this is:
3" foam (I used a polystyrene sheet)
2 plates or round objects - one needs to be smaller than the other one
Balsa
Cocktail sticks
MDF for the base
Mark out the smaller ring (the fort is round) with a marker pen on the foam sheet.
Mark out the wider ring (about an inch or two bigger) with the marker pen.
Using a long bladed craft knife cut out the larger ring. Go in at an angle because you want the fort walls to be thicker at the bottom than the top.
Then cut out the inner ring - be a bit more careful here as you don't want to break your doughnut!
Stick the doughnut onto an MDF board with a hot glue gun. Its better to base it before you start work on it.
Using some sand paper, round off the top of the fort walls and get rid of any lumps and bumps.
Use a craft knife to cut out the doorway.
Use a pencil to poke holes in the sides of the wall for muskets and artillery pieces.
Cut some lengths of cocktail sticks and push them into the fort walls.
Using some balsa offcuts, panel the door way and make some doors.
I added a small hut to the fort, made from cocktail sticks and some T Shirt material - you want it to look like a tent.
Now water down some wall filler and give the whole fort a thorough covering. You might need to do give it two coats as the foam soaks it up. When this is dry (give it at least 12 hours), use sandpaper to get rid of any runs or lumps.
I give the whole thing a really good coat of Sandtex Bitter Chocolate. Black is too stark. So go for a very dark brown.
Once dry, give it a heavy dry brush of caramel, then cream and a final heavy dry brush of white. You can then go in a pick out the wood with Vallejo Leather under a Devlan Mud wash.
The base is straightforward. Give it a coat of PVA and cover it with sand. I painted the base Americana Honey, then dry brushed it with white. To finish off I added some Woodland Scenics clump foliage.
There, you should be able to make one yourself now! If you don't fancy it, I could be persuaded to make one for you, just let me know.
I do like that one, Jon! I have to say I know precious little of the Sudan wars, so had no idea the Sudanese built lovely little doughnut-shaped forts! How many men were usually garrisoned in them? or were they like Iron Age Hill Forts, and intended for the villagers to run into if attacked?
ReplyDeleteRichard - apparently they built them along the Nile to try and fend off the gunboats. I would guess around 50 with an antique artillery piece.
ReplyDelete